How to Prepare a Wall for Wallpaper
If you want your wallpaper to look flawless and last for years to come, proper wall preparation is essential. Skipping this step can lead to bubbling, peeling, or uneven results. To successfully hang wallpaper, your wall needs to be smooth, clean, dry, and free from any substances that could affect adhesion - like old backing paper, dust, grease, mildew, or ink stains.
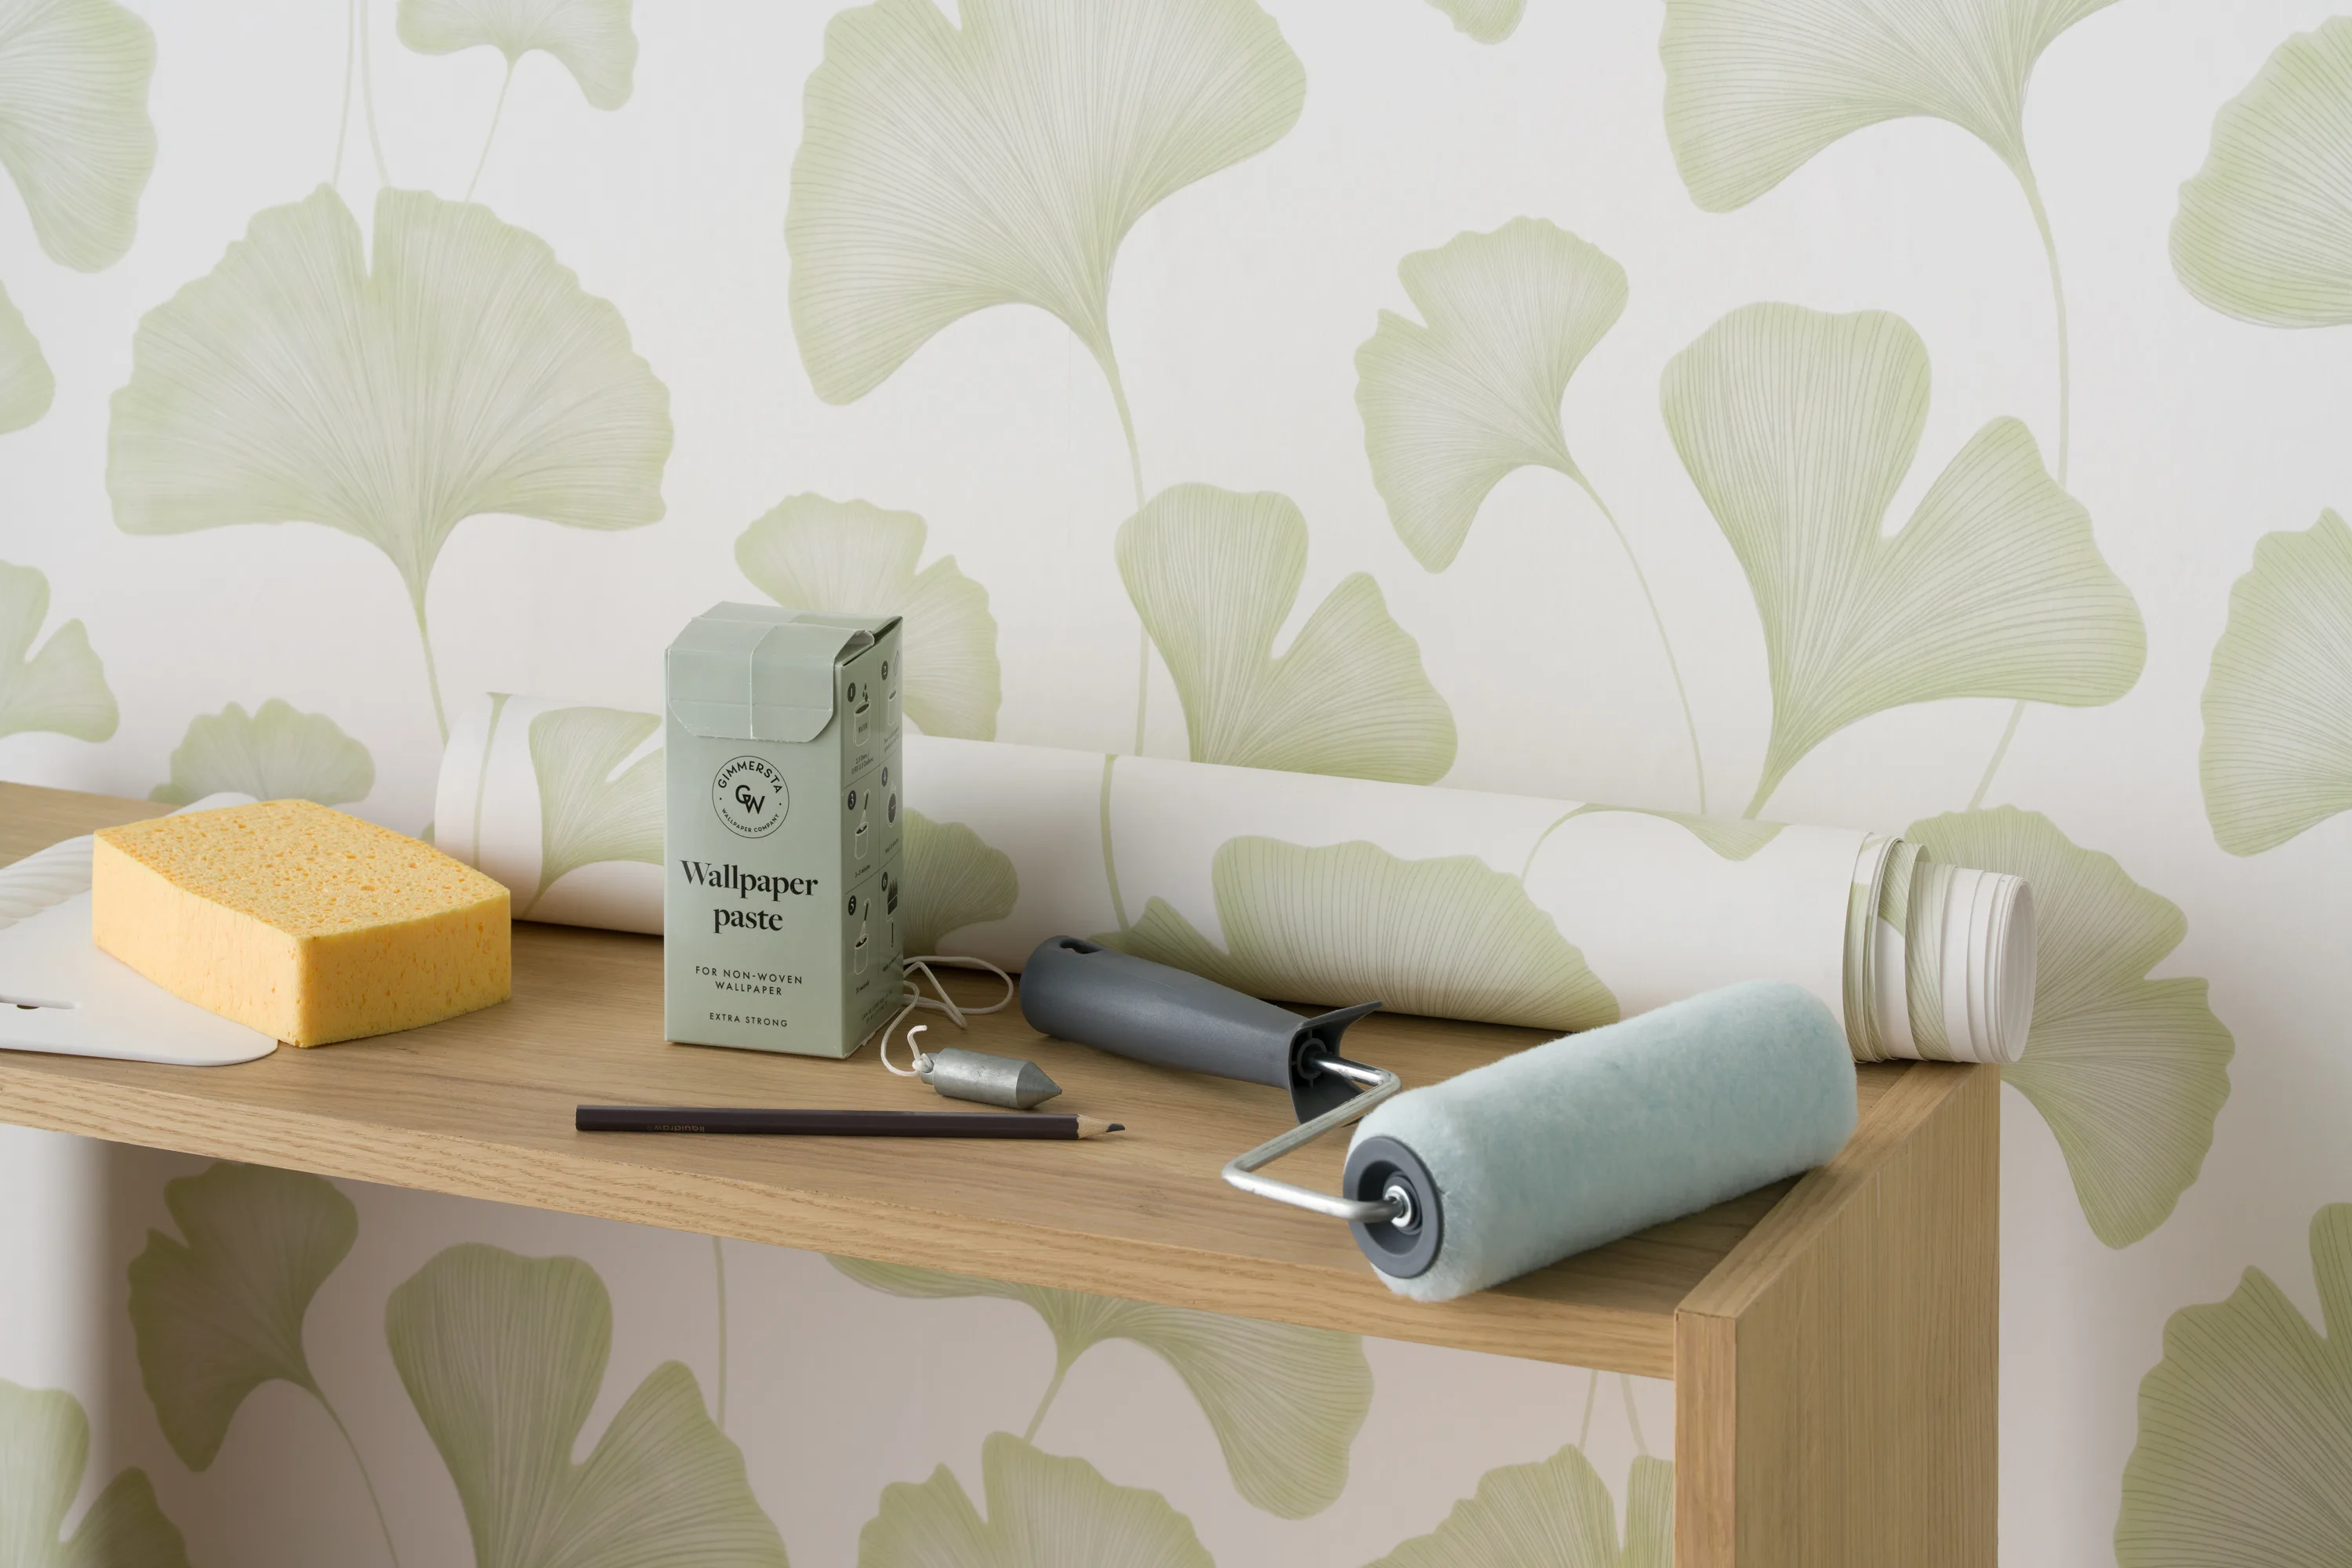
What you’ll need to prepare the wall
Essentials:
Sandpaper (medium to fine grit)
Sponge or soft cloth
Optional but recommended:
Primer or diluted wallpaper paste (for sealing)
Paintbrush or roller (to apply the primer)
Repair filler
Scraper or filling knife
General steps to prepare a wall for wallpaper
Remove hardware: Take out any nails, screws, or wall plugs. Fill the holes and cracks with wall filler, smoothing it out with a scraper.
Switch off the power: For safety, turn off the electricity at the mains and remove any socket or switch covers.
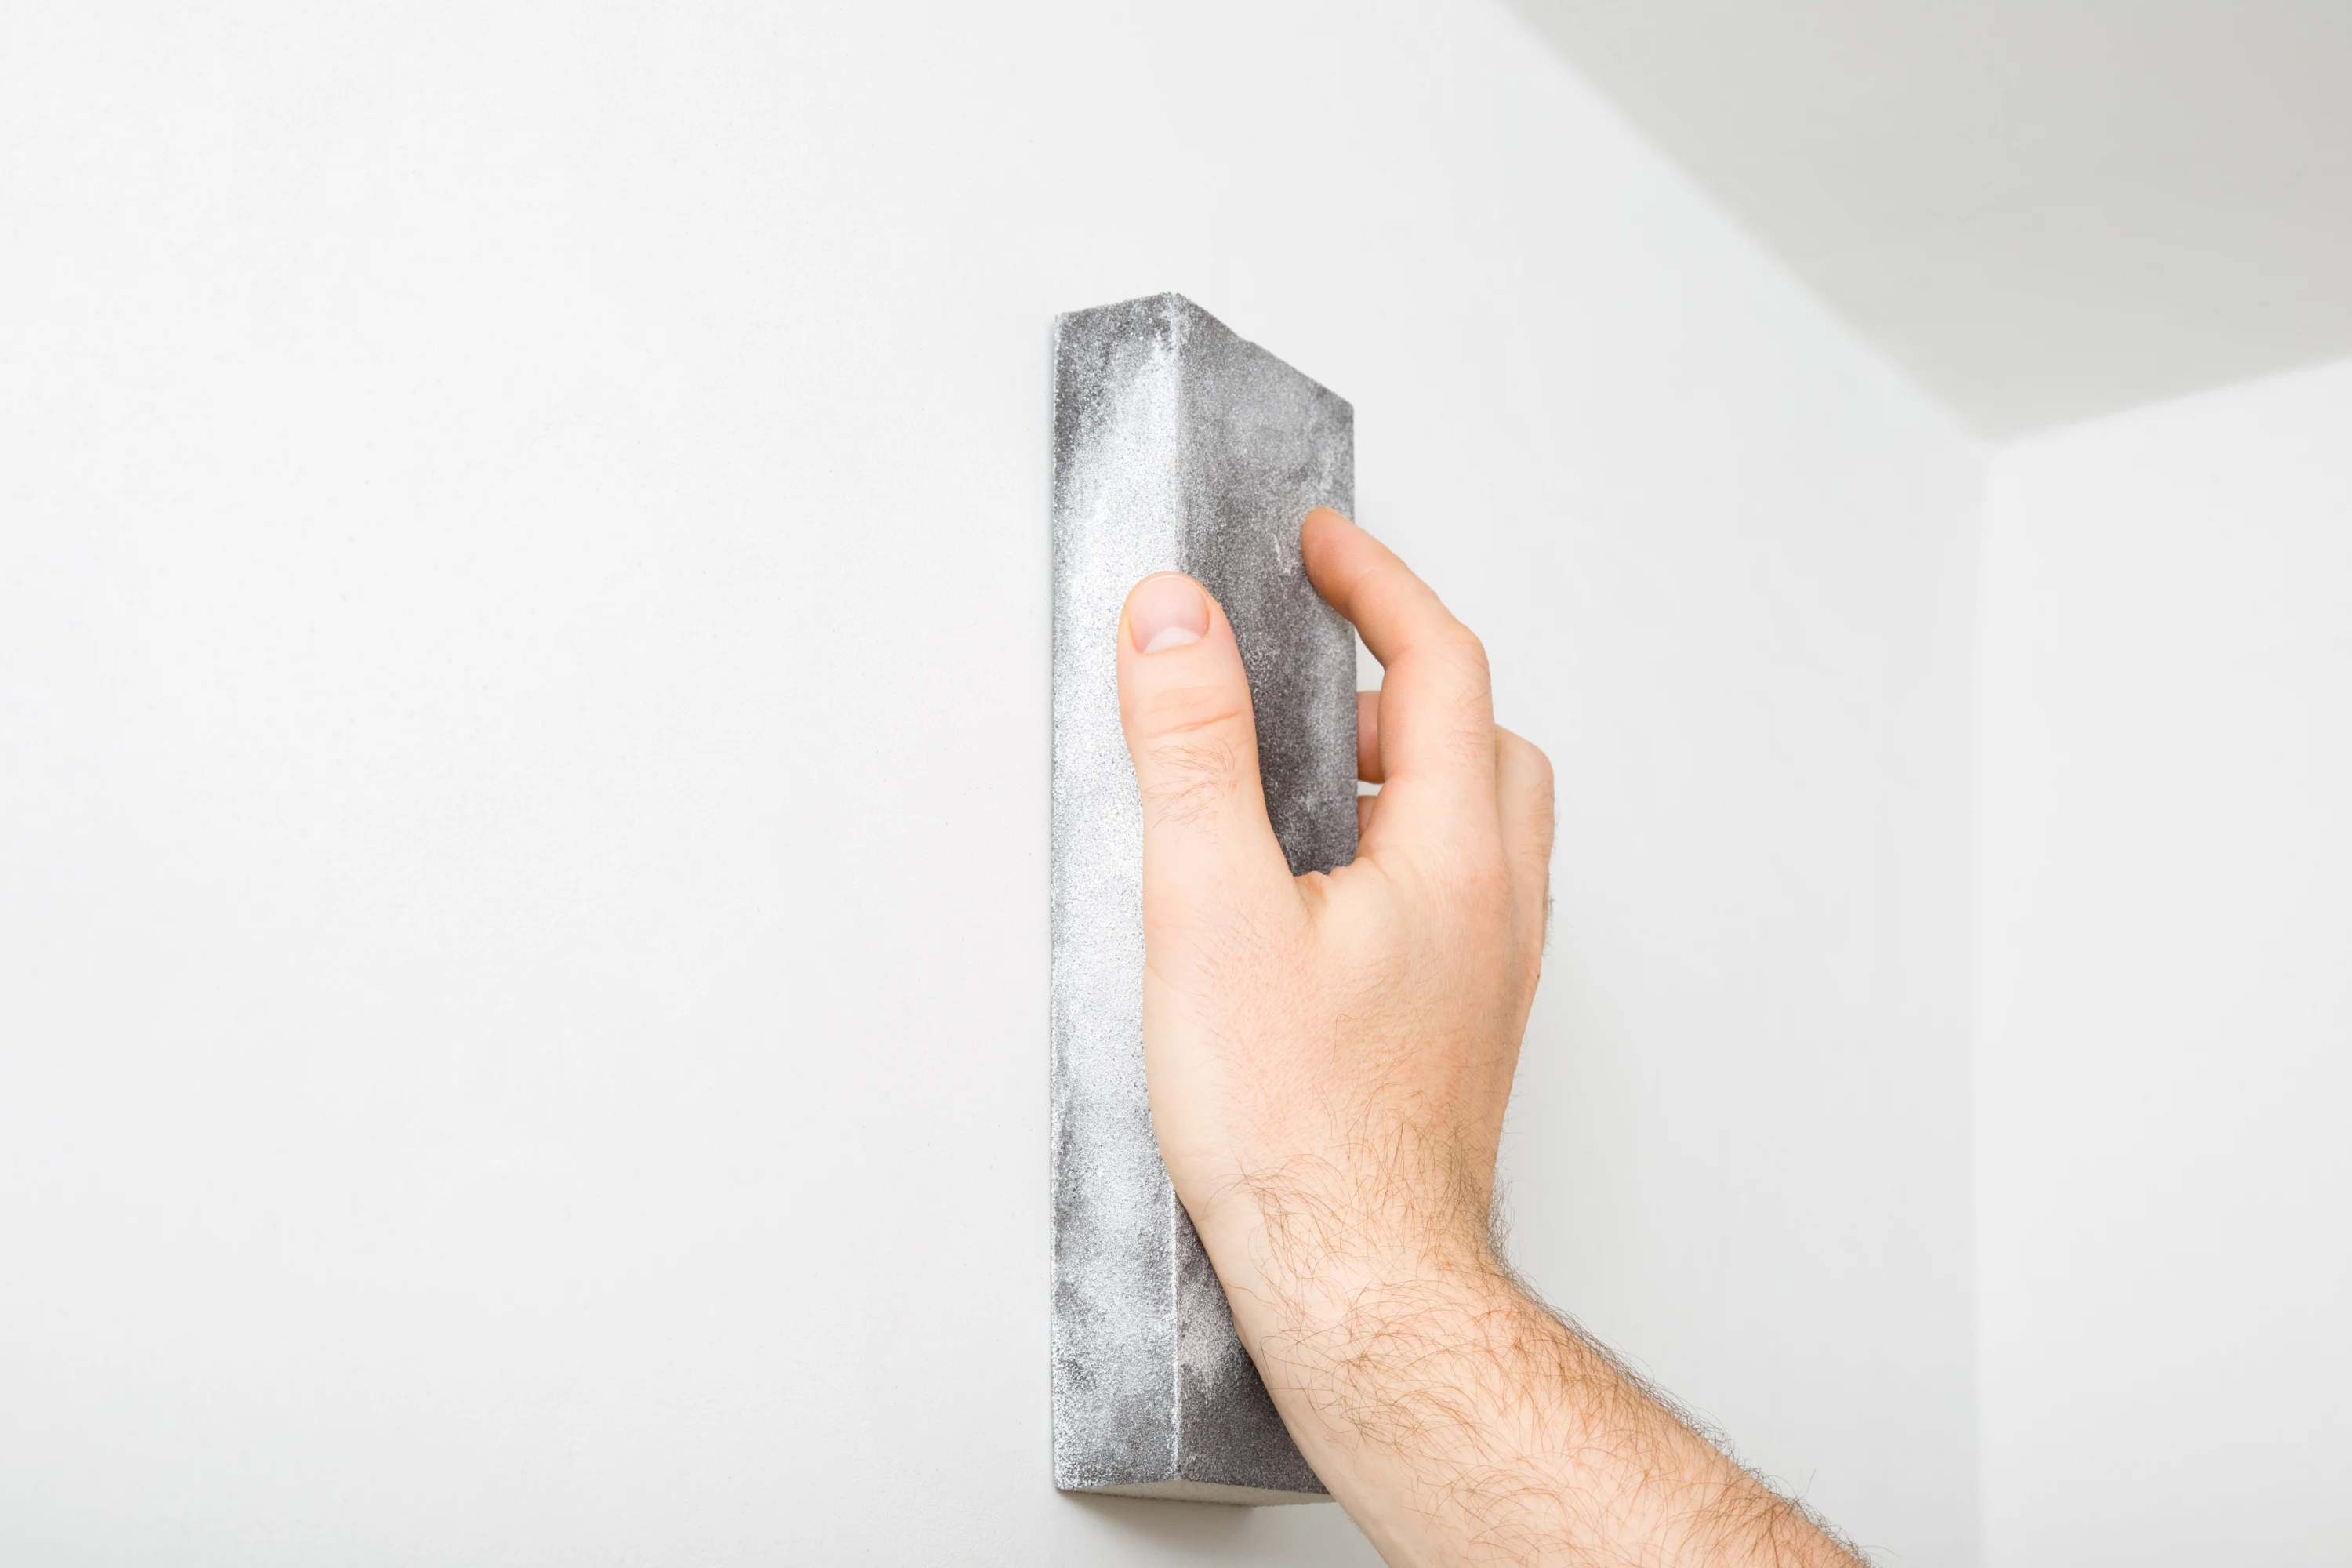
Smooth the surface: Fill holes or joins, and sand down rough or uneven patches until the wall feels consistently smooth.
Clean thoroughly: Use a sponge and warm, soapy water to wipe down the walls. Rinse with clean water and allow the surface to dry fully - at least 24 hours.
How to prepare different wall surfaces
1. Painted walls
If your wall is already painted with emulsion (water-based paint), you can wallpaper directly over it, as long as the surface is clean and dry. For freshly painted walls, wait at least 4 weeks before wallpapering to ensure the paint has fully cured. Always check the manufacturer’s drying and curing times, as these can vary by brand and paint type.
2. Porous surfaces (e.g. plaster or cement render)
For new plaster, make sure it's completely dry. This usually takes around 4–6 weeks, depending on thickness and ventilation. For old plaster, confirm it's free from mold and flaking. If you’re working with a textured wall, fill any holes and sand down any rough spots to make it as smooth as possible.
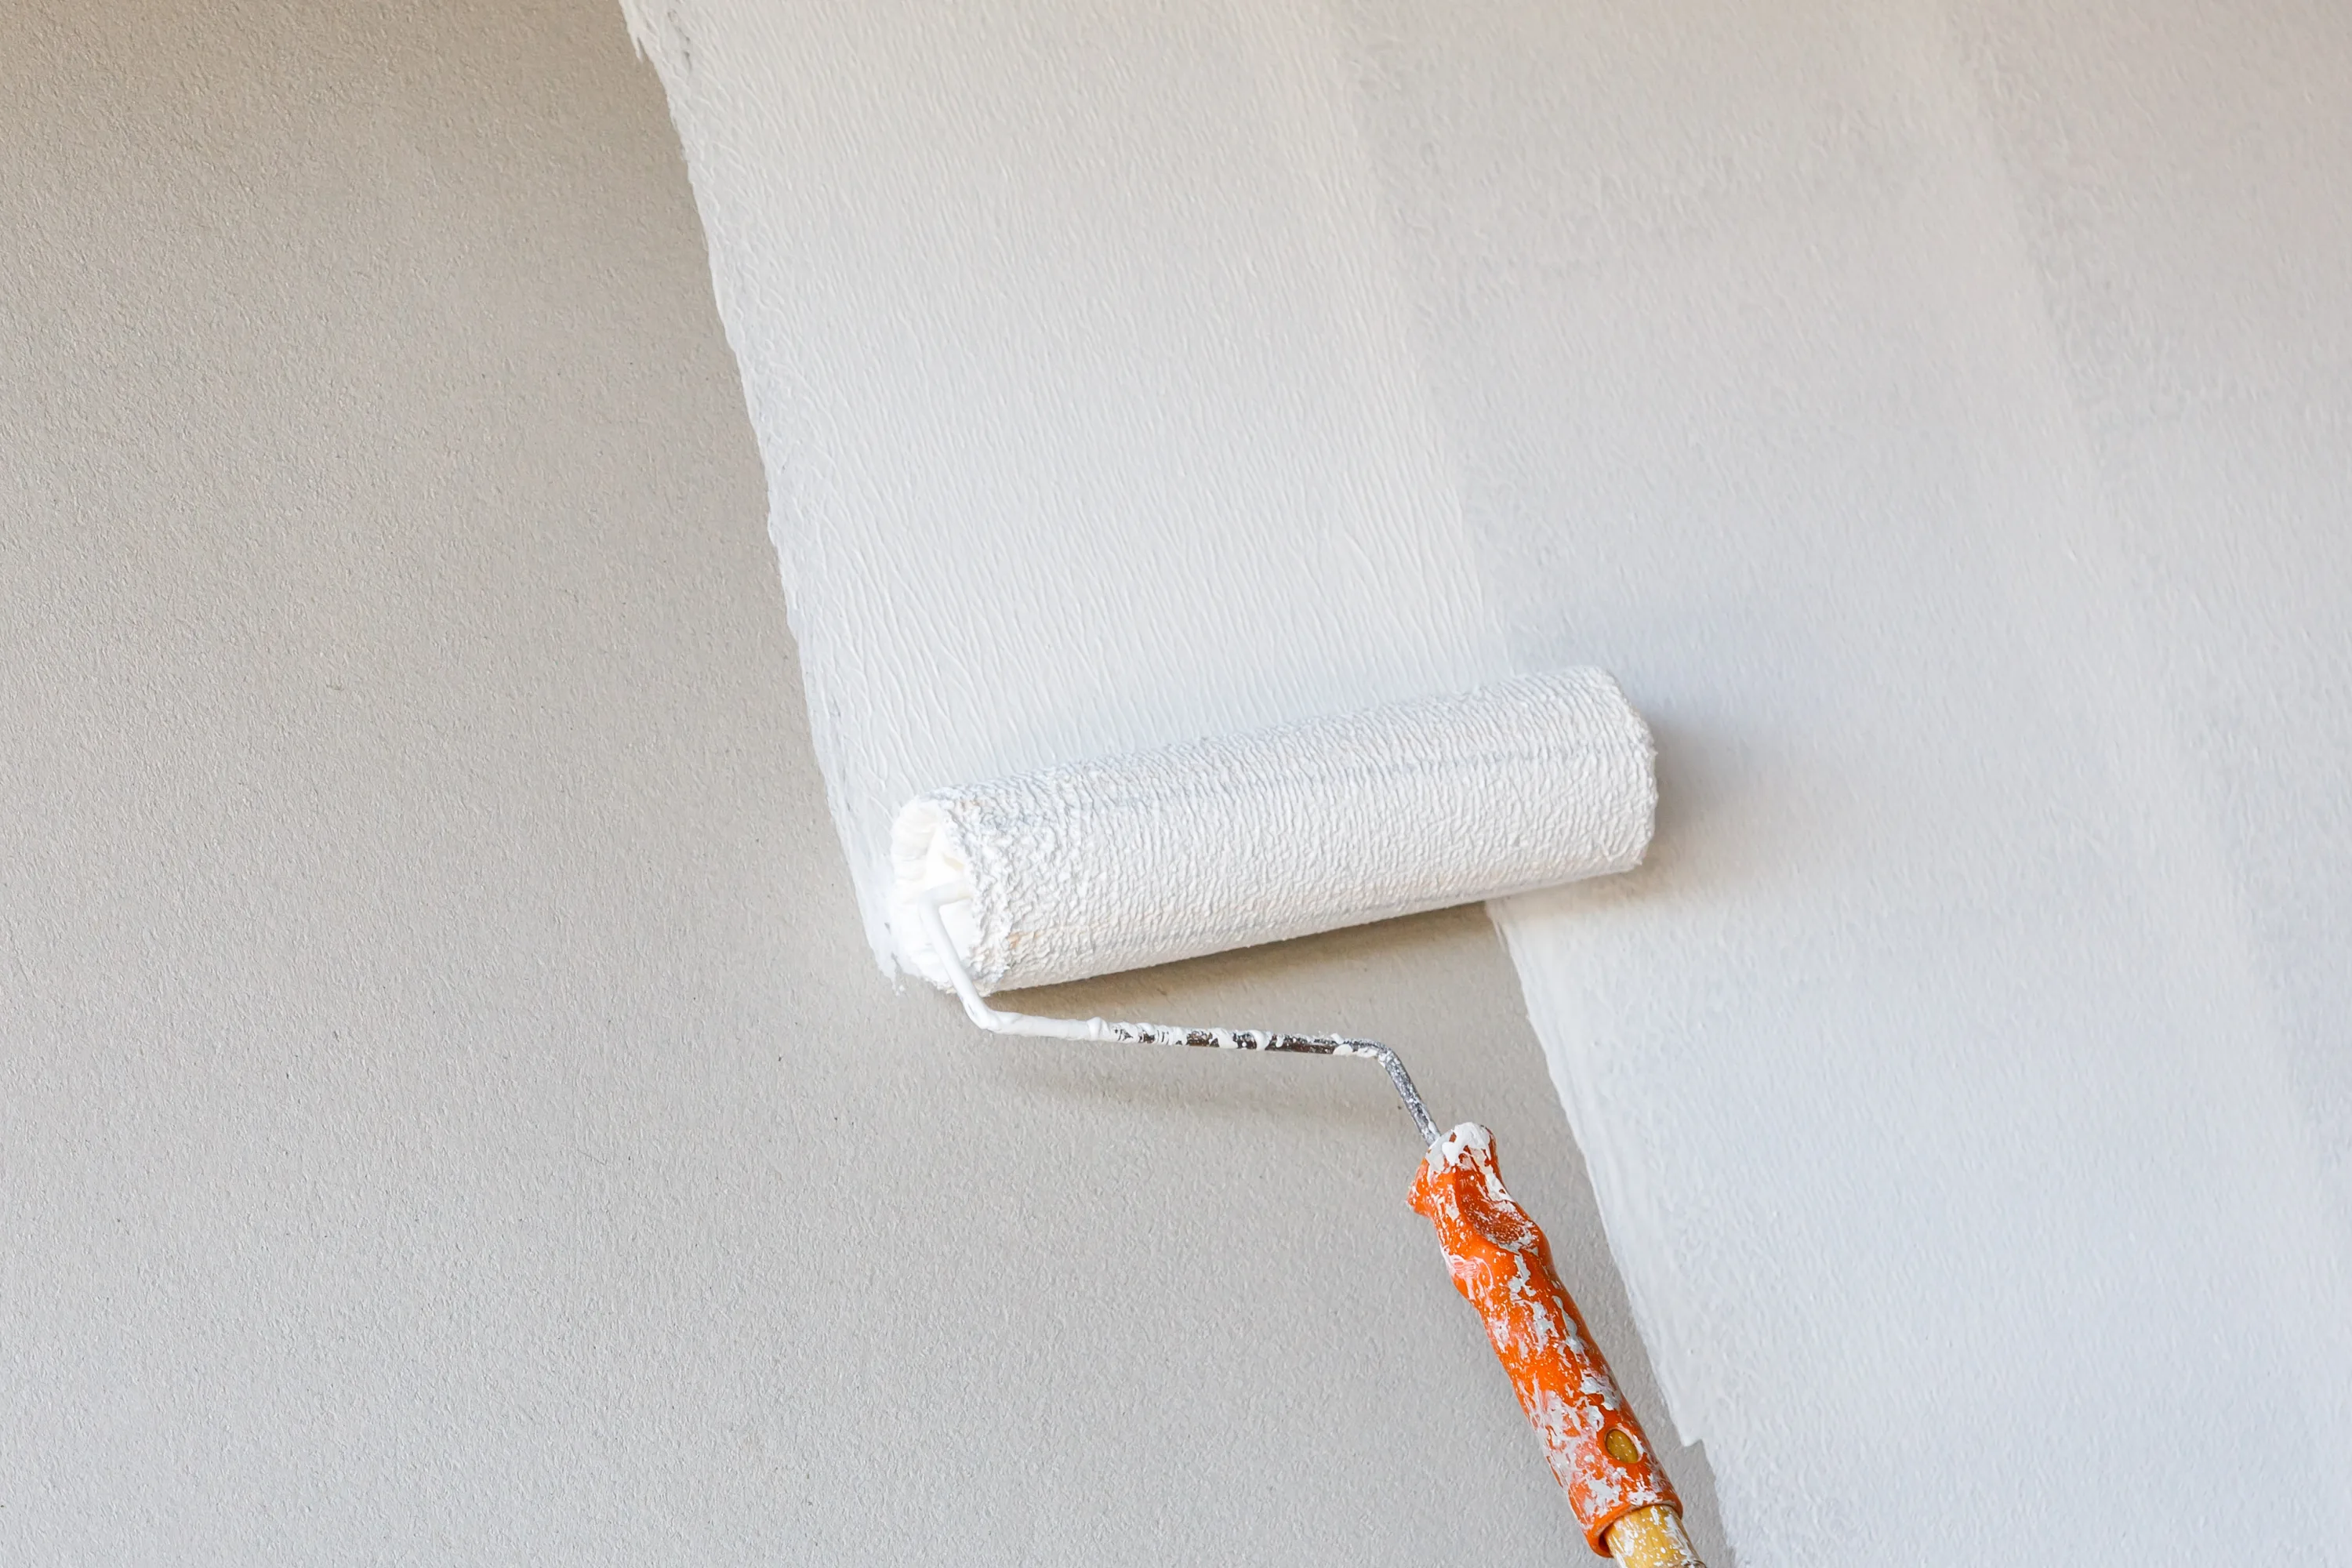
Once the surface is smooth and dry, apply a wall primer or diluted wallpaper paste to seal the wall. Let the sealer dry completely as this prevents your wallpaper paste from being absorbed too quickly, which can affect adhesion.
3. Plasterboard (drywall)
With plasterboard, make sure all screw holes and joints are filled and sanded. Then apply a primer or diluted paste to seal the surface and let it dry thoroughly before wallpapering. This prevents uneven drying and helps your wallpaper adhere properly.
How to seal a wall for wallpapering
Sealing a porous wall transforms it into a non-porous surface, ensuring your wallpaper adhesive bonds properly and evenly. This step is especially important for materials like plaster, cement, and new drywall, which naturally absorb moisture and can cause the paste to dry too quickly - leading to poor adhesion or bubbling. Use a dedicated wallpaper primer or a diluted wallpaper paste to seal the surface. For best results, always follow the application and drying instructions provided on the product’s packaging.
Tips: Preparing walls for wallpaper
Can you wallpaper on painted walls?
Yes - provided the paint is sound, not peeling, and fully cured (especially for freshly painted surfaces). Glossy finishes may need a light sanding to help the adhesive grip.
Should I repaint my wall before I wallpaper it?
Ideally, you want your wall to have a light, uniform colour. If this isn’t the case for you right now, we recommend painting it. If your wall has a dark paint colour or a pattern, this may show through your wallpaper if the wallpaper is a lighter colour than the current wall.
Can I wallpaper over existing wallpaper?
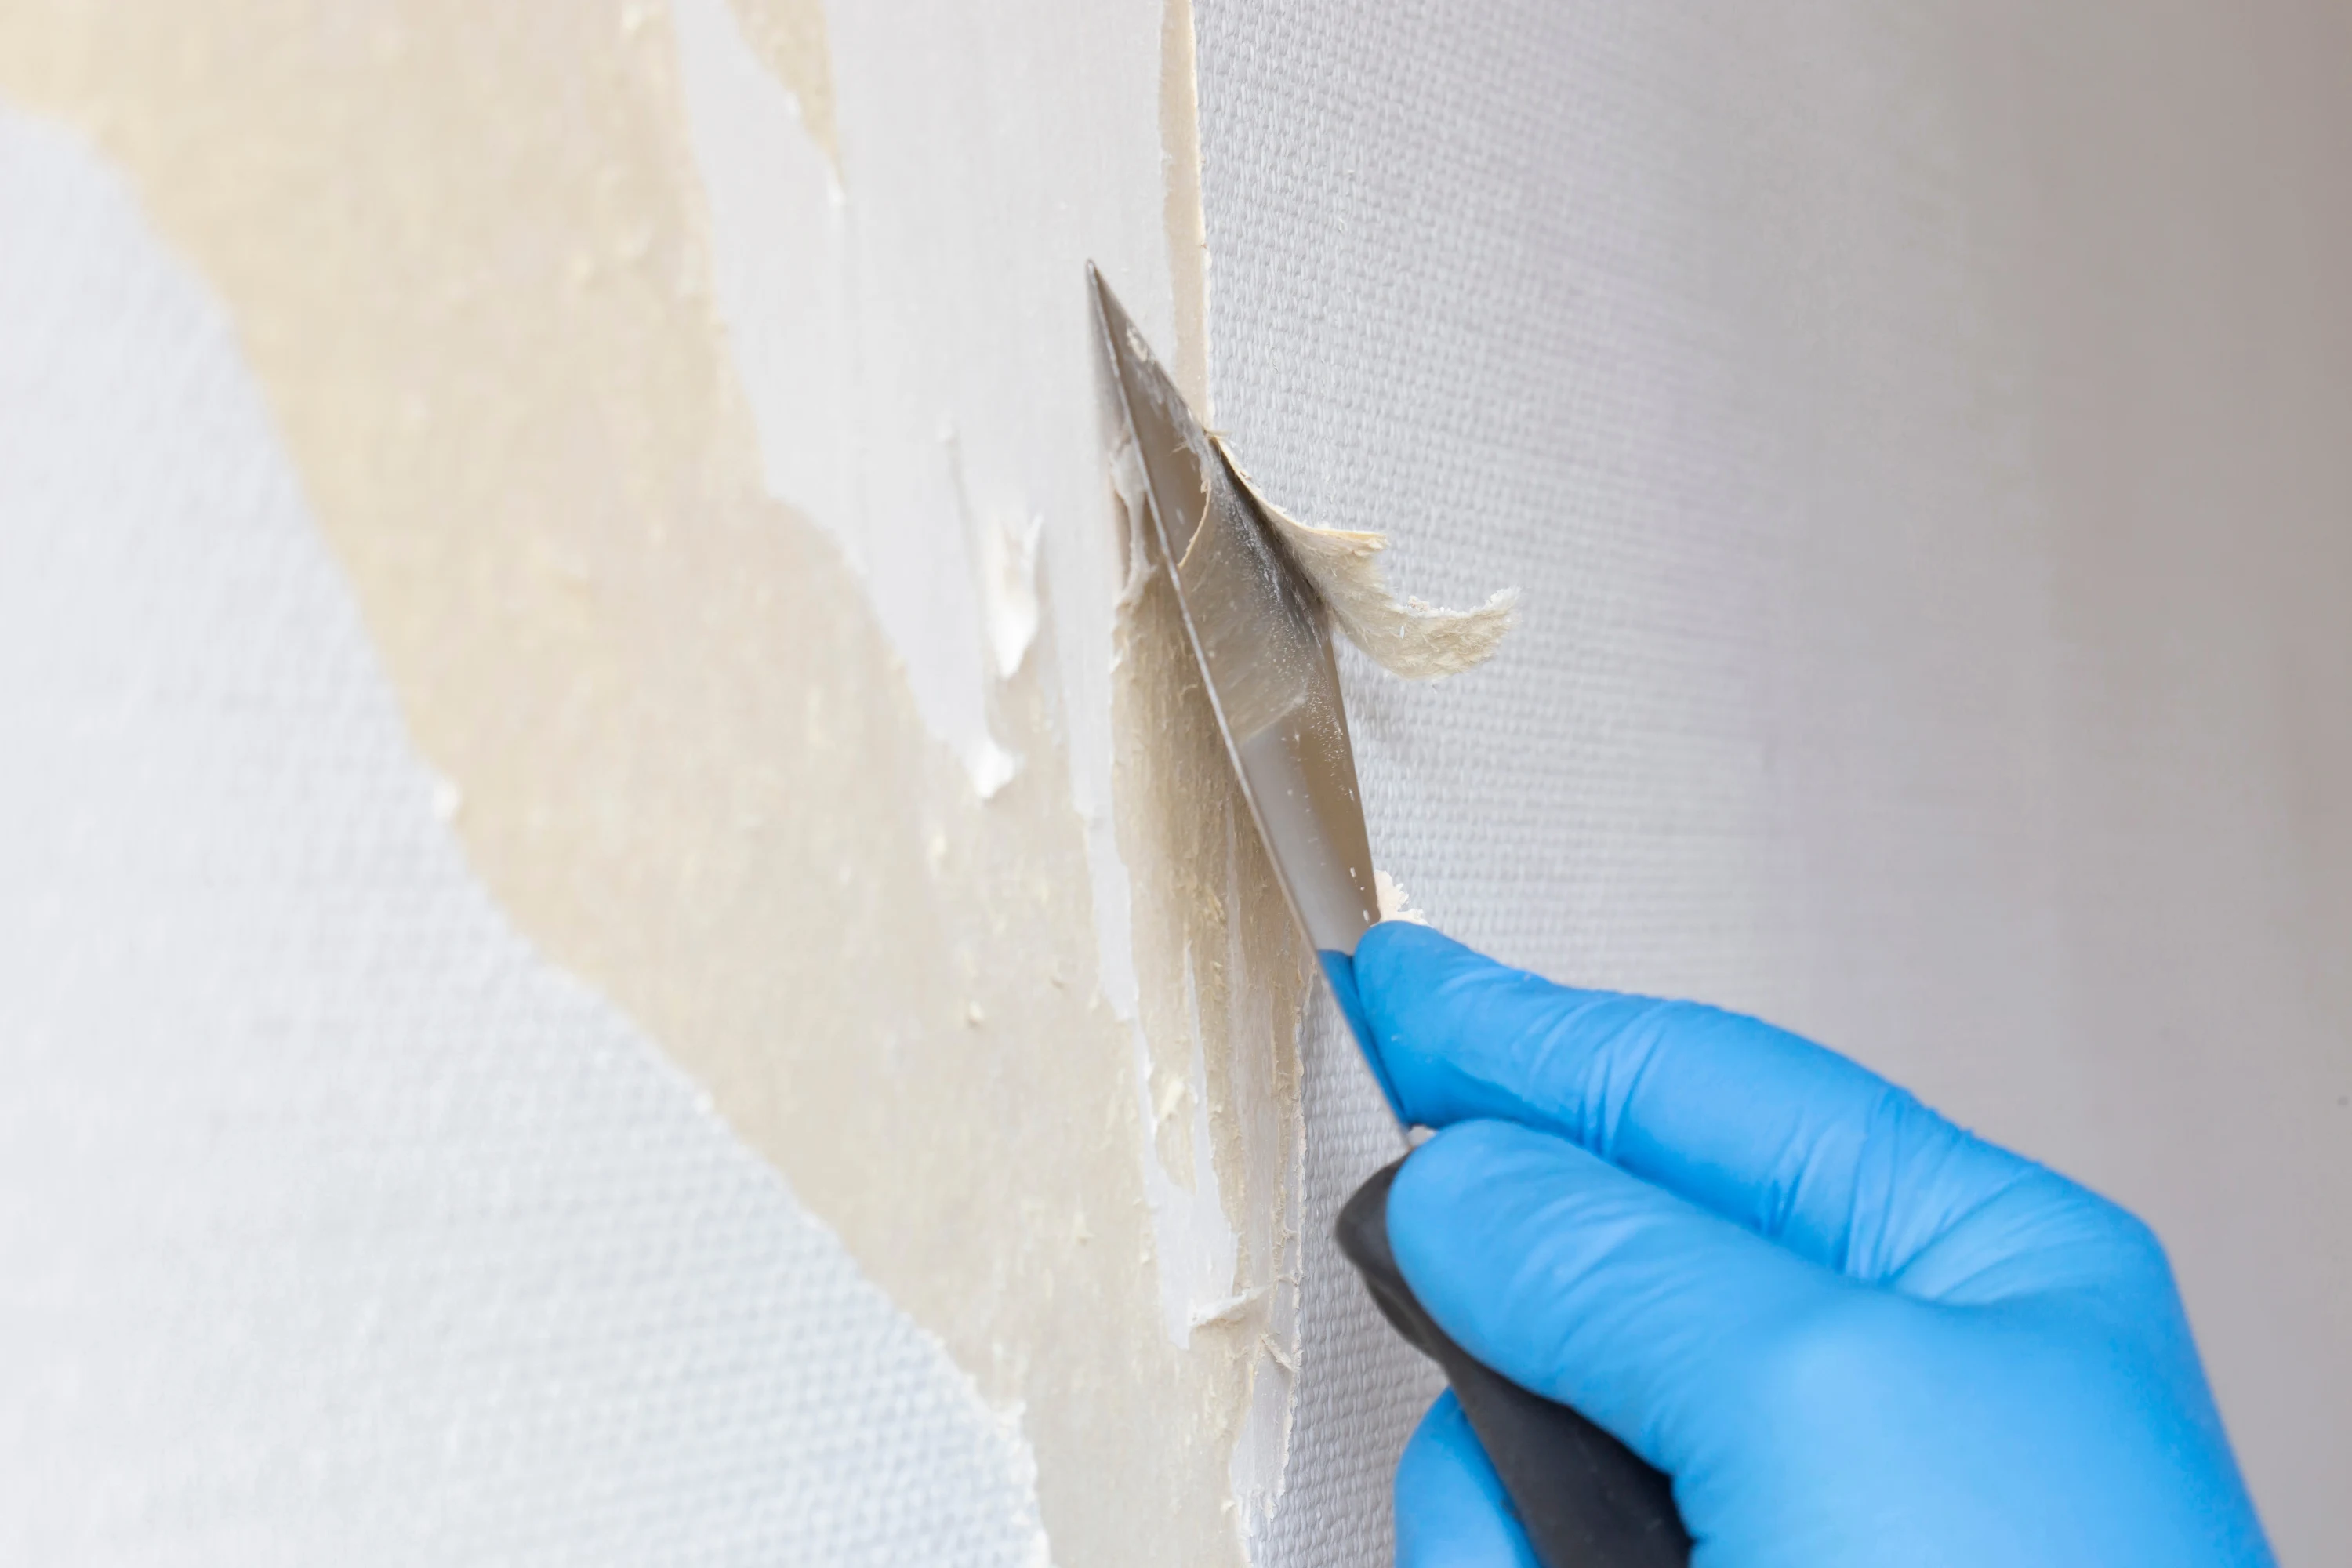
We don’t recommend wallpapering over existing wallpaper, as it can lead to poor adhesion, visible seams, and an uneven finish. For the best results, we strongly advise removing any old wallpaper before starting your project.
Once the old wallpaper is stripped, you may find leftover adhesive or residue. Clean the wall thoroughly using warm water and a scraper. For more detailed advice, check out our guide on how to remove wallpaper without a steamer. If the glue is stubborn, a wallpaper steamer or adhesive remover may be necessary. Just take care not to damage the wall surface, and always allow the wall to dry completely before applying your new wallpaper.
Did you know that at Hovia, our standard wallpaper is made with a dry-strippable backing. This special coating allows the paper to come off in larger pieces - often without the need for a steamer - so future updates are quicker and cleaner.
Can you put up wallpaper without paste?
Absolutely. Peel and stick wallpaper (also known as self-adhesive wallpaper) comes with a pre-applied adhesive. Simply peel off the backing and stick it directly to the wall. It’s a great option for renters or anyone looking for a quicker, less messy installation process.
However, it's important to note that peel and stick wallpaper may not adhere properly to walls painted with washable or stain-resistant paints, as these finishes are designed to repel substances, including adhesives. If your walls have a washable paint finish, it’s best to opt for traditional paste-the-wall wallpaper or consider priming the surface with a wallpaper-friendly primer for better adhesion.
We offer a huge range of peel and stick designs to suit every style - from bold abstract designs to soft, subtle patterns. Whether you're decorating a rental or just want an easier update, there's something in our collection to match your vision.
Final Thoughts
Taking time to prepare your walls properly ensures a smoother wallpapering process and a better end result. Whether you’re dealing with painted surfaces, plaster, or drywall, following the correct prep steps helps your wallpaper look beautiful and stay firmly in place.
For more help, check out our full range of wallpaper installation guides and get ready to transform your space with confidence.